Whimsical Graduation Cookie Pops
Highlighted under: Cozy Recipes
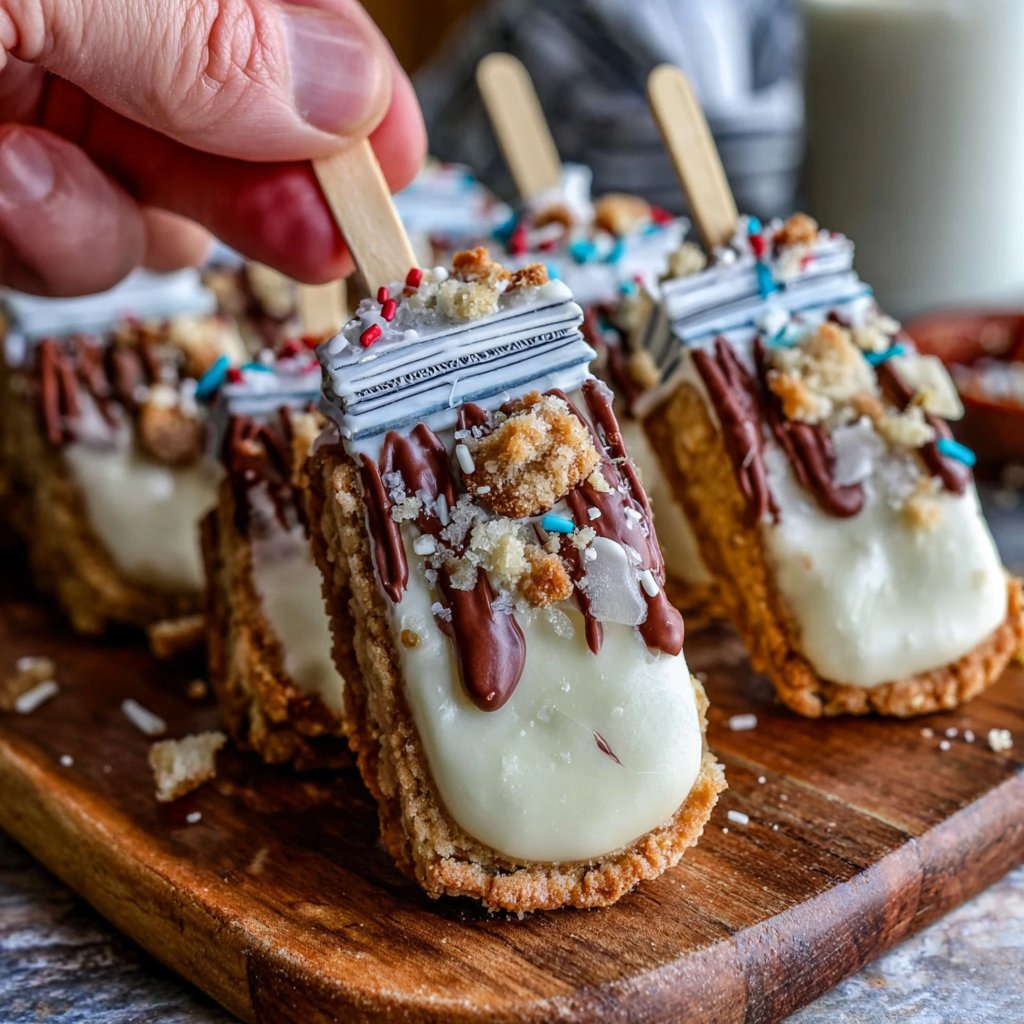
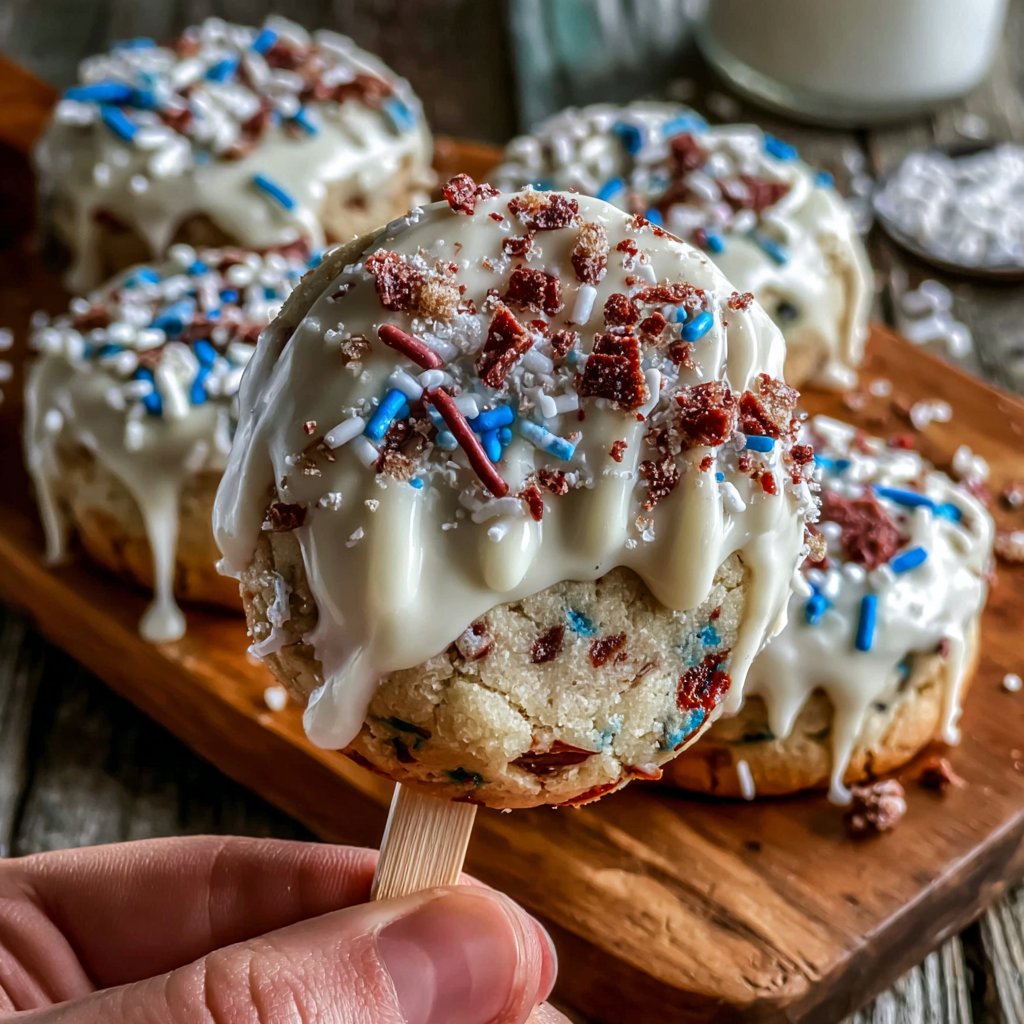
I love making festive treats for celebrations, and these Whimsical Graduation Cookie Pops are a perfect touch for any graduation party. Each cookie pop is not only adorable with its mortarboard cap and diploma, but they’re also deliciously sweet, making them a delightful surprise for graduates and guests alike. I found that using a sturdy cookie base and a smooth coating of chocolate ensures they hold up well while being easy to eat. These pops are not only fun to decorate, but they also add a personal touch to the occasion.
When I first designed these cookie pops, I wanted to make something that would not only taste amazing but also bring a sense of joy and celebration to the table. The combination of buttery cookies, creamy chocolate, and vibrant decorations turns every bite into a fun experience. I've experimented with various shapes and flavors, but these delightful pops have become a crowd favorite!
One of my best tips is to allow the chocolate coating to set properly before adding decorations. This not only creates a cleaner look but also helps your decorations adhere better. The vibrant colors and fun shapes truly make these cookies pop – no pun intended!
Why You'll Love These Pops
- Adorable mortarboard and diploma designs that bring a fun twist to traditional cookies
- Customizable colors and decorations to match any graduation theme
- Deliciously sweet and satisfying cookies perfect for kids and adults alike
Crafting the Perfect Cookie Base
The foundation of these Whimsical Graduation Cookie Pops lies in the cookie dough. It's vital to ensure that the butter is softened but not melted; this creates a cookie that is chewy yet sturdy enough to hold the pops without breaking. When creaming the butter and sugar, aim for a light and fluffy texture, which typically takes about 3-5 minutes. This aeration helps the cookies rise nicely, so don't rush this step.
For the best results, when adding dry ingredients to the wet mix, do so gradually. This method prevents clumping and ensures even distribution. After combining, chilling the dough for 15 minutes is essential; it firms up the butter and allows for easier rolling. If you find your dough too sticky even after chilling, you can dust your work surface with additional flour to help manage it.
Decorating Your Cookie Pops
When melting the chocolate melts, using a microwave in short 30-second intervals will help avoid overheating. It’s best to stir the chocolate between intervals until it’s completely smooth and glossy. If you happen to overheat the chocolate, you can add a small amount of vegetable oil to salvage it and restore a nice, fluid consistency for coating the cookies.
For the design aspect, feel free to get creative with the edible papers for diplomas. Cutting them into rectangles of varying sizes can add a personalized touch. When applying the melted chocolate for decorations, a small piping bag can help you apply chocolate with precision, especially for the tassels. If you're looking for a shiny finish, consider using a sprinkle of edible glitter on top after the chocolate sets.
Ingredients
Gather these ingredients to create your whimsical cookie pops:
For the Cookie Base
- 2 cups all-purpose flour
- 1/2 cup unsweetened cocoa powder
- 1 cup unsalted butter, softened
- 1 cup granulated sugar
- 1 large egg
- 1 tsp vanilla extract
- 1/2 tsp baking powder
- 1/4 tsp salt
For Decorating
- 12 lollipop sticks
- 2 cups chocolate melts (black and white)
- Colorful sprinkles
- Small pieces of edible paper (for diplomas)
- Miniature tassels (optional)
Make sure to have fun while preparing your cookie pops!
Instructions
Here’s how to create your whimsical cookie pops:
Prepare the Cookie Dough
In a large bowl, cream together the butter and sugar until light and fluffy. Beat in the egg and vanilla extract. In another bowl, mix the flour, cocoa powder, baking powder, and salt. Gradually add the dry ingredients to the wet ingredients until combined. Chill the dough for 15 minutes.
Bake the Cookies
Preheat your oven to 350°F (175°C). Roll the chilled dough to about 1/4 inch thickness and cut into desired shapes. Place the cut-out cookies on a baking sheet lined with parchment paper. Bake for 12-15 minutes or until set. Allow cookies to cool completely.
Decorate the Cookie Pops
Melt the chocolate melts in a microwave or double boiler. Dip the end of each lollipop stick in chocolate, then insert it into the bottom of each cookie. Dip the entire cookie pop in chocolate, letting excess drip off. Allow the coating to set before decorating.
Finish Your Pops
Once the chocolate is set, use additional melted chocolate to attach edible paper pieces as diplomas. Dip the edge in colorful sprinkles for a festive finish. If desired, attach miniature tassels on top of the mortarboard.
Enjoy these delightful cookie pops at your graduation celebration!
Pro Tips
- Make sure your cookies are completely cooled before decorating to prevent the chocolate from melting. Experiment with different chocolate colors to match your school’s colors!
Storage and Make-Ahead Tips
These cookie pops can be made a day in advance, which makes them ideal for party prep. Once decorated and fully set, store them in an airtight container at room temperature. They can last for up to one week without losing their texture. Just be cautious about humidity, as it can affect the chocolate coating, causing it to lose its shine.
If you want to make the cookie base ahead of time, you can also freeze the dough. Shape the dough into discs, wrap in plastic wrap, and freeze for up to three months. When you're ready to bake, simply thaw in the refrigerator overnight before rolling and cutting your cookie shapes.
Serving Suggestions
These cookie pops are fantastic as standalone treats for a graduation party. To elevate their presentation, consider displaying them in a decorative vase or a pop holder to resemble a bouquet. This not only makes for a stunning centerpiece but also allows guests to grab them easily as they mingle.
For added fun, you could personalize the pops with the graduate’s school colors or initials. Use colored chocolate melts to dip the cookies according to the theme, and don’t shy away from combining colors to create layers. This customization can add a meaningful touch to the celebration, making each cookie pop a unique treat.
Questions About Recipes
→ Can I make these cookie pops ahead of time?
Yes! You can bake the cookies a day in advance and decorate them the day of your event for freshness.
→ What can I use instead of chocolate melts?
You can use tempered chocolate or candy melts available at craft stores. They both work well for coating.
→ How should I store the cookie pops?
Store them in an airtight container at room temperature for up to 5 days. They can also be refrigerated for longer freshness.
→ Can I customize the designs?
Absolutely! Feel free to get creative with different sprinkles, colors, and shapes to match your graduation theme.
Whimsical Graduation Cookie Pops
Created by: The Chefgeorgefoods Team
Recipe Type: Cozy Recipes
Skill Level: Intermediate
Final Quantity: 12 pops
What You'll Need
For the Cookie Base
- 2 cups all-purpose flour
- 1/2 cup unsweetened cocoa powder
- 1 cup unsalted butter, softened
- 1 cup granulated sugar
- 1 large egg
- 1 tsp vanilla extract
- 1/2 tsp baking powder
- 1/4 tsp salt
For Decorating
- 12 lollipop sticks
- 2 cups chocolate melts (black and white)
- Colorful sprinkles
- Small pieces of edible paper (for diplomas)
- Miniature tassels (optional)
How-To Steps
In a large bowl, cream together the butter and sugar until light and fluffy. Beat in the egg and vanilla extract. In another bowl, mix the flour, cocoa powder, baking powder, and salt. Gradually add the dry ingredients to the wet ingredients until combined. Chill the dough for 15 minutes.
Preheat your oven to 350°F (175°C). Roll the chilled dough to about 1/4 inch thickness and cut into desired shapes. Place the cut-out cookies on a baking sheet lined with parchment paper. Bake for 12-15 minutes or until set. Allow cookies to cool completely.
Melt the chocolate melts in a microwave or double boiler. Dip the end of each lollipop stick in chocolate, then insert it into the bottom of each cookie. Dip the entire cookie pop in chocolate, letting excess drip off. Allow the coating to set before decorating.
Once the chocolate is set, use additional melted chocolate to attach edible paper pieces as diplomas. Dip the edge in colorful sprinkles for a festive finish. If desired, attach miniature tassels on top of the mortarboard.
Extra Tips
- Make sure your cookies are completely cooled before decorating to prevent the chocolate from melting. Experiment with different chocolate colors to match your school’s colors!
Nutritional Breakdown (Per Serving)
- Calories: 180 kcal
- Total Fat: 9g
- Saturated Fat: 5g
- Cholesterol: 30mg
- Sodium: 60mg
- Total Carbohydrates: 23g
- Dietary Fiber: 1g
- Sugars: 15g
- Protein: 2g